Many people ask professional photographers for tips on how to pose well and be photogenic. Aside from those who have always been photogenic, for most of us, posing in front of a camera is a skill that can be learned. Between ideal outfits, makeup, framing, and posing, here are some tips to be photogenic and learn how to pose.
1. Use makeup suitable for the photo shoot
Shiny skin or a pale complexion can easily ruin a photo shoot. To avoid this disaster, it is highly recommended to know and follow makeup tips. For the complexion, it’s best to opt for a lightweight product. This is infallible for brightening the face. To conceal imperfections, nothing beats concealers. For the eyes, avoid pearlescent shades, as they do not photograph well. The trick is to focus on light shades for successful images. To achieve an intense gaze, why not apply black mascara? What about the lips? For lively and plump lips, go for a light and glossy shade.
2. Wear the right outfit
Just like makeup, the outfit is very important for becoming photogenic and feeling confident while posing. That’s why it’s essential to take the time to find the ideal outfit for unforgettable and beautiful photos. Pay attention to the patterns and colors of the outfit. The principle is that it should be in perfect harmony with the camera. Forget large patterns to avoid looking washed out. Of course, it’s not about dressing to the nines, but wearing outfits that highlight your body and personality. For this, wear colors that complement your skin and avoid horizontal stripes. Visit espacemode.be to find the outfit of your dreams to feel confident and photogenic in photos.
3. Adopt the right pose
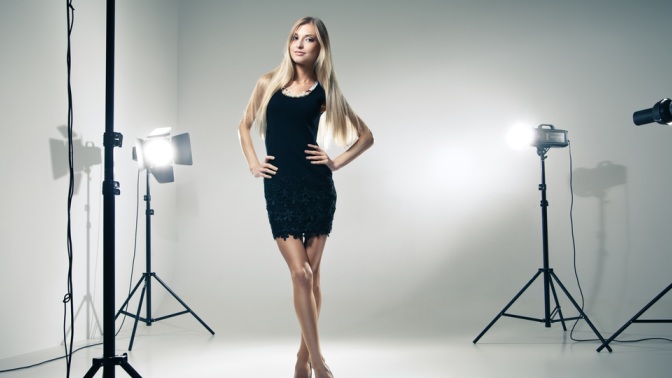
In photos, stars often pose with a profile view to minimize roundness and add depth. If you don’t know what your best profile is, just pose on your left profile! Don’t forget to tilt your head, lift your chin, and smile with your teeth and eyes. For a full-body shot, take inspiration from models! They generally position their bodies at a 45° angle to the camera, with one foot crossed in front of the other.
4. Find the perfect framing
The last tip for being photogenic is to find the perfect framing. In photography, some people are highlighted from certain angles, while they may look less flattering from others. That’s why it’s essential to find a flattering angle. Ideally, position yourself in the middle of the photo, and never at the edge of the frame. To succeed in a selfie, it’s advisable to hold the camera slightly elevated and with your arm extended, to avoid a double chin and slim the face.
5. Master lighting and post-production
A factor often overlooked for appearing naturally photogenic is lighting: it sculpts shapes, reveals skin texture, and sets the mood of an image. Prefer soft, diffuse light rather than harsh lighting that creates strong shadows, and experiment with side lighting or backlighting to create depth. Playing with lighting, composition, retouching allows for subtle nuances and enhances the contours of the face without forcing the pose. Think about white balance to maintain credible skin tones, adjust exposure to avoid blown highlights, and vary distance and focal length to control depth of field and background bokeh. Using a reflector or diffuser, even improvised, can soften shadows and highlight the eyes, while thoughtful positioning relative to the light source instantly improves the quality of the shot.
After shooting, post-production is the stage where you refine the creative intent: light color grading, contrast management, and local retouching to preserve the natural texture of the skin are common practices. Adapting the treatment to the goals of the portrait—reportage, fashion, corporate, or artistic—ensures a consistent atmosphere. Adopt a simple workflow to save originals and work on copies using masks for precise corrections, and calibrate your screen for accurate rendering. If you want to delve deeper into these techniques or find shooting services that master these technical aspects, visit Altitude Photo’s website to learn more.
Pay attention to staging and mental preparation
Beyond posing techniques and equipment, the quality of a shoot often relies on previsualization and scenography: imagining a short story, planning sequences of movements, and choosing props that enhance the visual narrative helps produce coherent and expressive images. Work on smooth transitions between attitudes rather than stiff postures, playing with breathing rhythm and gestures to maintain natural dynamism. Micro-adjustments of the gaze and micro-expressions create subtle variations that allow for nuanced emotional expression without exaggerated gestures; learn to spot and repeat these small marks of expressiveness to make them controlled and photogenic.
Before the shoot, adopt a short ritual: quick facial warm-up, rehearsals in front of a mirror, or video recording in a single shot to analyze the fluidity and continuity of movements. These practices facilitate body confidence and help anticipate shot sequences during a series of takes. Also consider tactile and visual aspects such as fabric texture, volumes, and silhouette in motion—elements that influence photographic perception without being strictly related to makeup or framing. If you wish to deepen the overall approach (mental preparation, staging, and project follow-up).
Optimize technical settings and file management
To transcend a good pose into a memorable image, think beyond framing and refine the capture settings: manage ISO to control digital noise, adjust the aperture to control depth of field, and select the shutter speed based on movement to maintain sharpness. Using bracketing facilitates capturing different exposures on the same scene, while reading the histogram helps avoid blown highlights. In complex lighting, test an ND filter to balance brightness or experiment with long exposure to create fluid backgrounds; monitor focus and autofocus to ensure sharpness on the face or eyes, the key area of the portrait.
After shooting, structure a clear workflow to enhance your images: prioritize RAW format to retain latitude and nuances, add EXIF metadata, and use a consistent naming system to facilitate sorting, while keeping redundant backups (local + cloud). Consider color profiles (ICC profile) when exporting to ensure faithful reproduction across different media and avoid excessive compression that alters grain and texture. Documenting shooting parameters and creating digital “proofs” helps communicate with the client and prepare optimized prints or web deliverables.
Prepare production and visual ambiance
Beyond gestures in front of the lens, a successful shoot begins with clear art direction: create a moodboard and a short storyboard to define the tone, color palette, and textures you wish to emphasize. The choice of props, fabrics, and hair accessories contributes to the narrative; prefer items that speak and reinforce the intent rather than superfluous decorative elements. Scouting locations allows you to identify visual hooks (textured backgrounds, leading lines, reflective surfaces) and assess logistics (access, parking, power outlets). Anticipate constraints: possible permits, safety, and a backup plan in case of bad weather or unforeseen events.
During pre-production, structure a precise schedule—roadmap, light slots like golden hour, makeup breaks, and outfit changes—and integrate quick tests in real conditions (test shots for light and color, softbox or other modifier tests). These trials also allow for adjusting the color palette and recording visual references for post-production (tone balance, film grain, and desired micro-contrast). Involving the subject in this preparation—by sharing the moodboard and explaining the process—strengthens collaboration and trust, which often translates into more authentic images.